Introduction
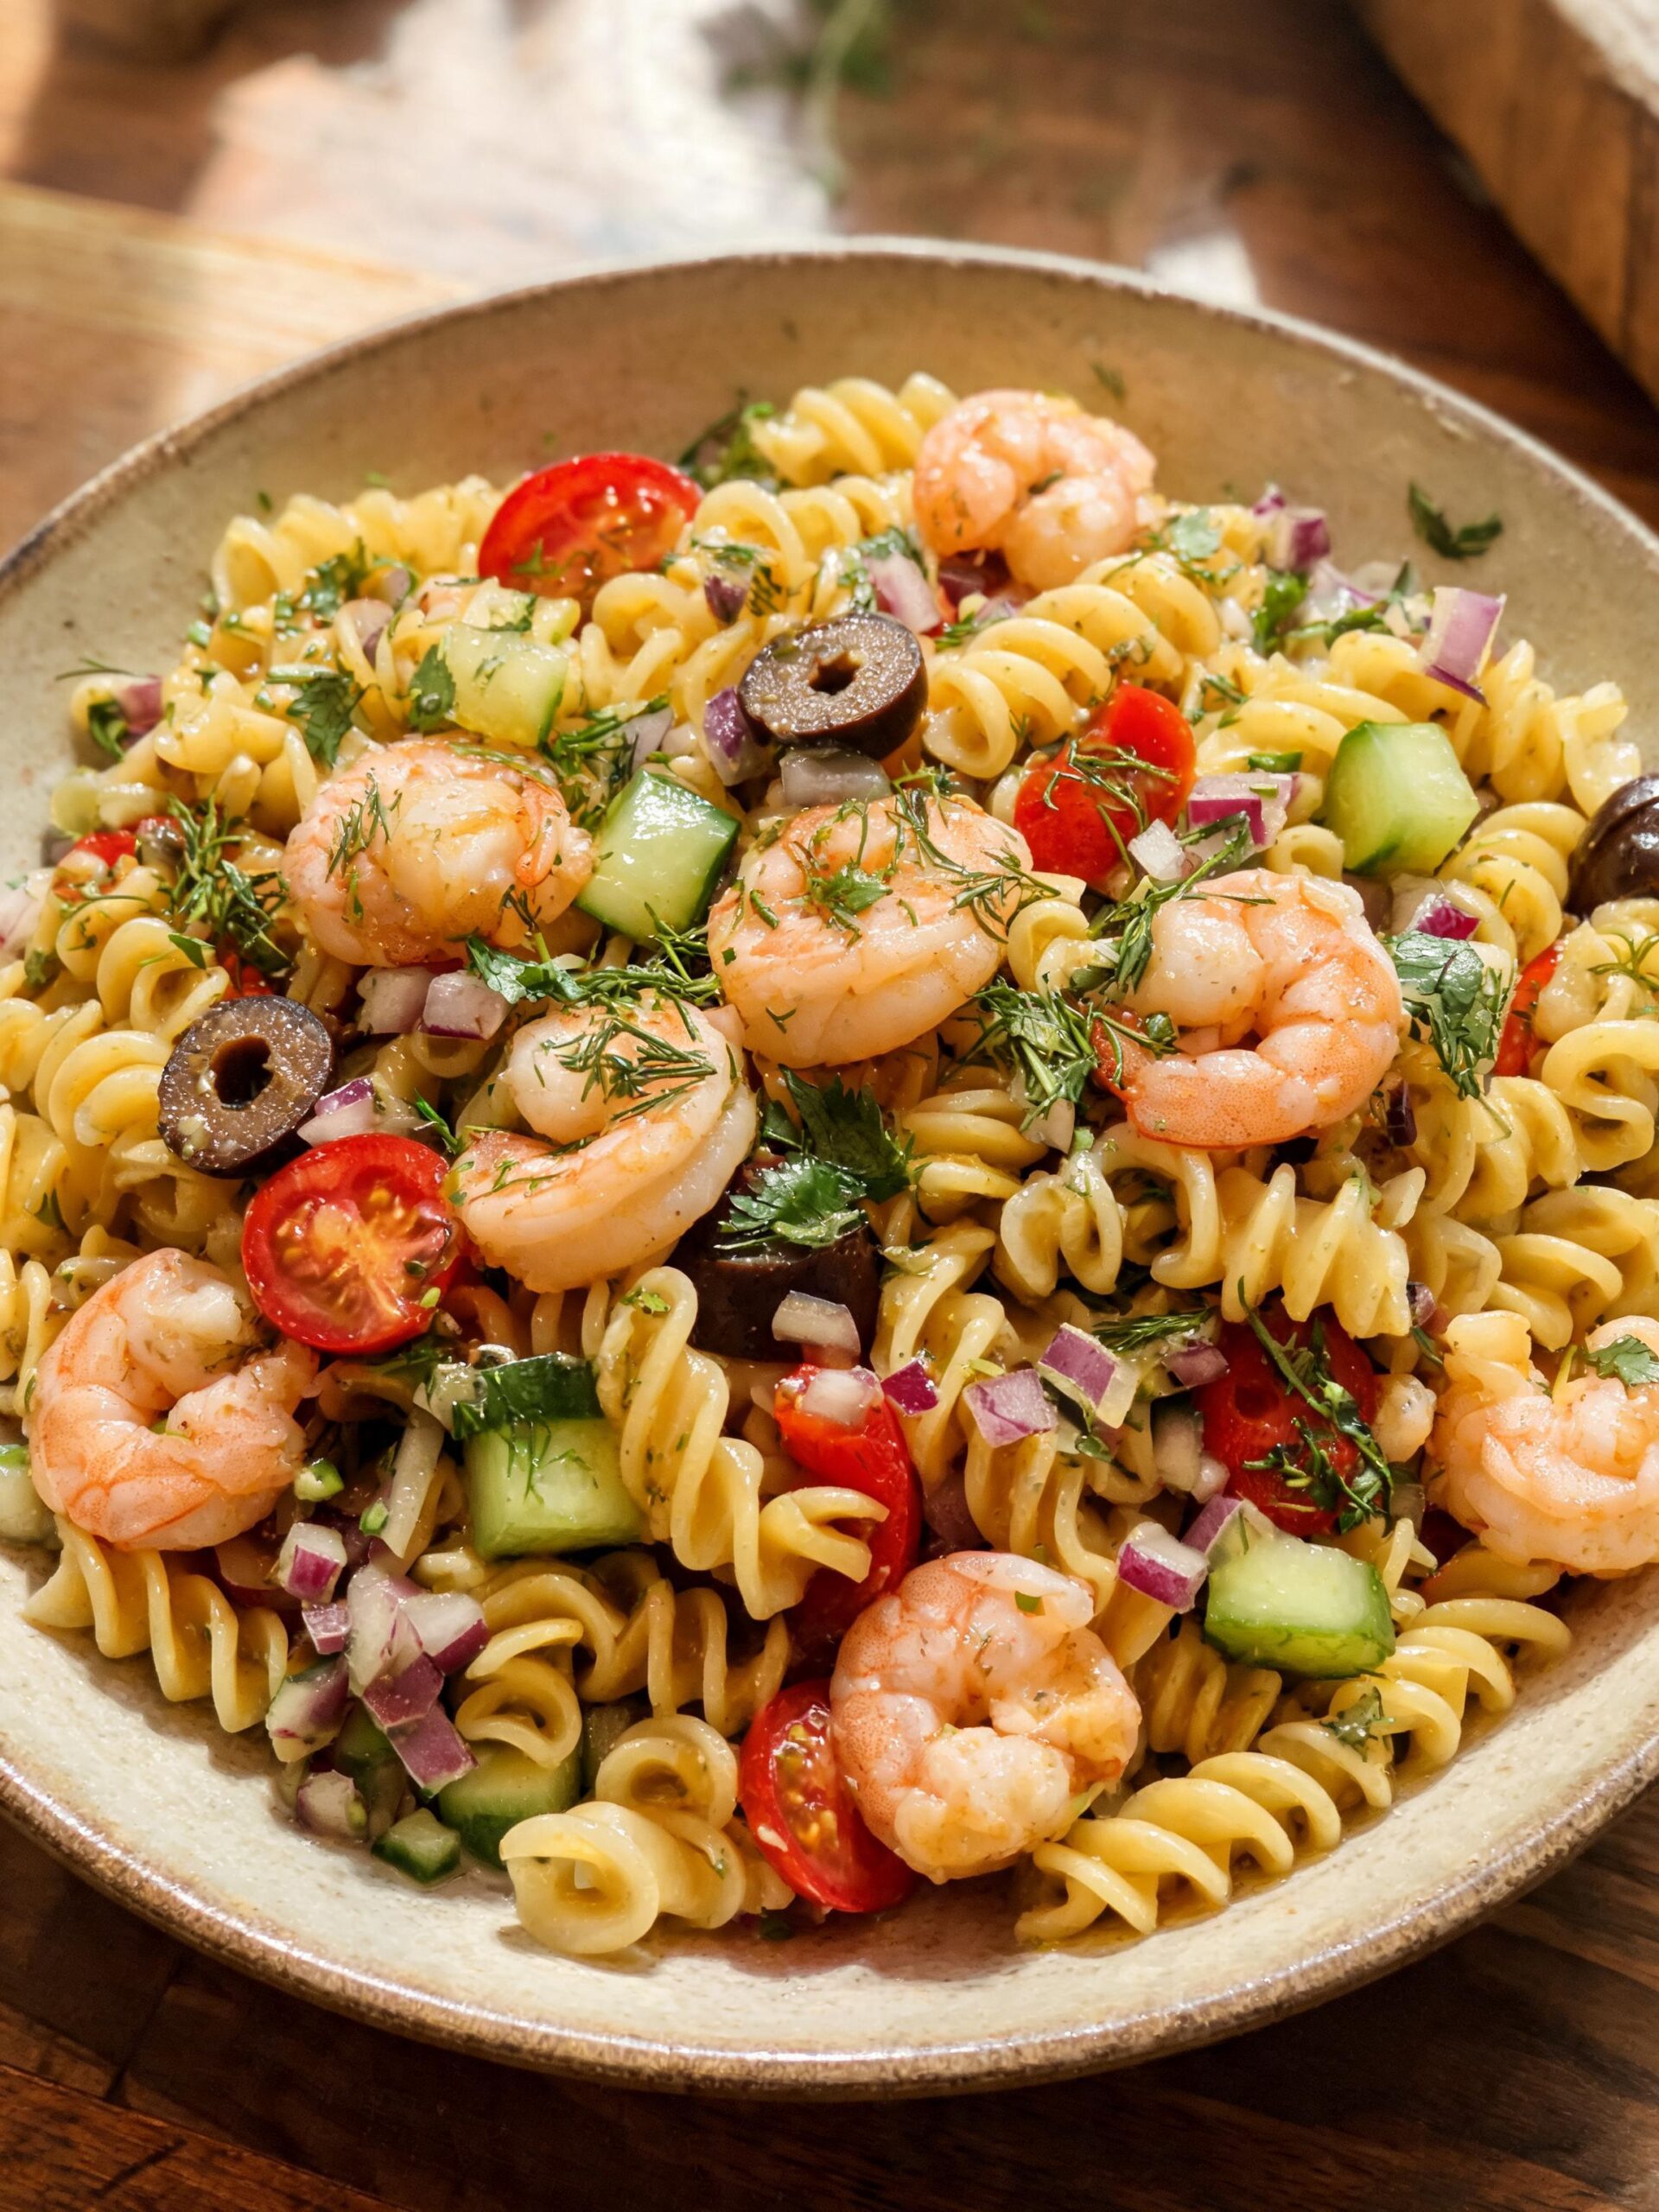
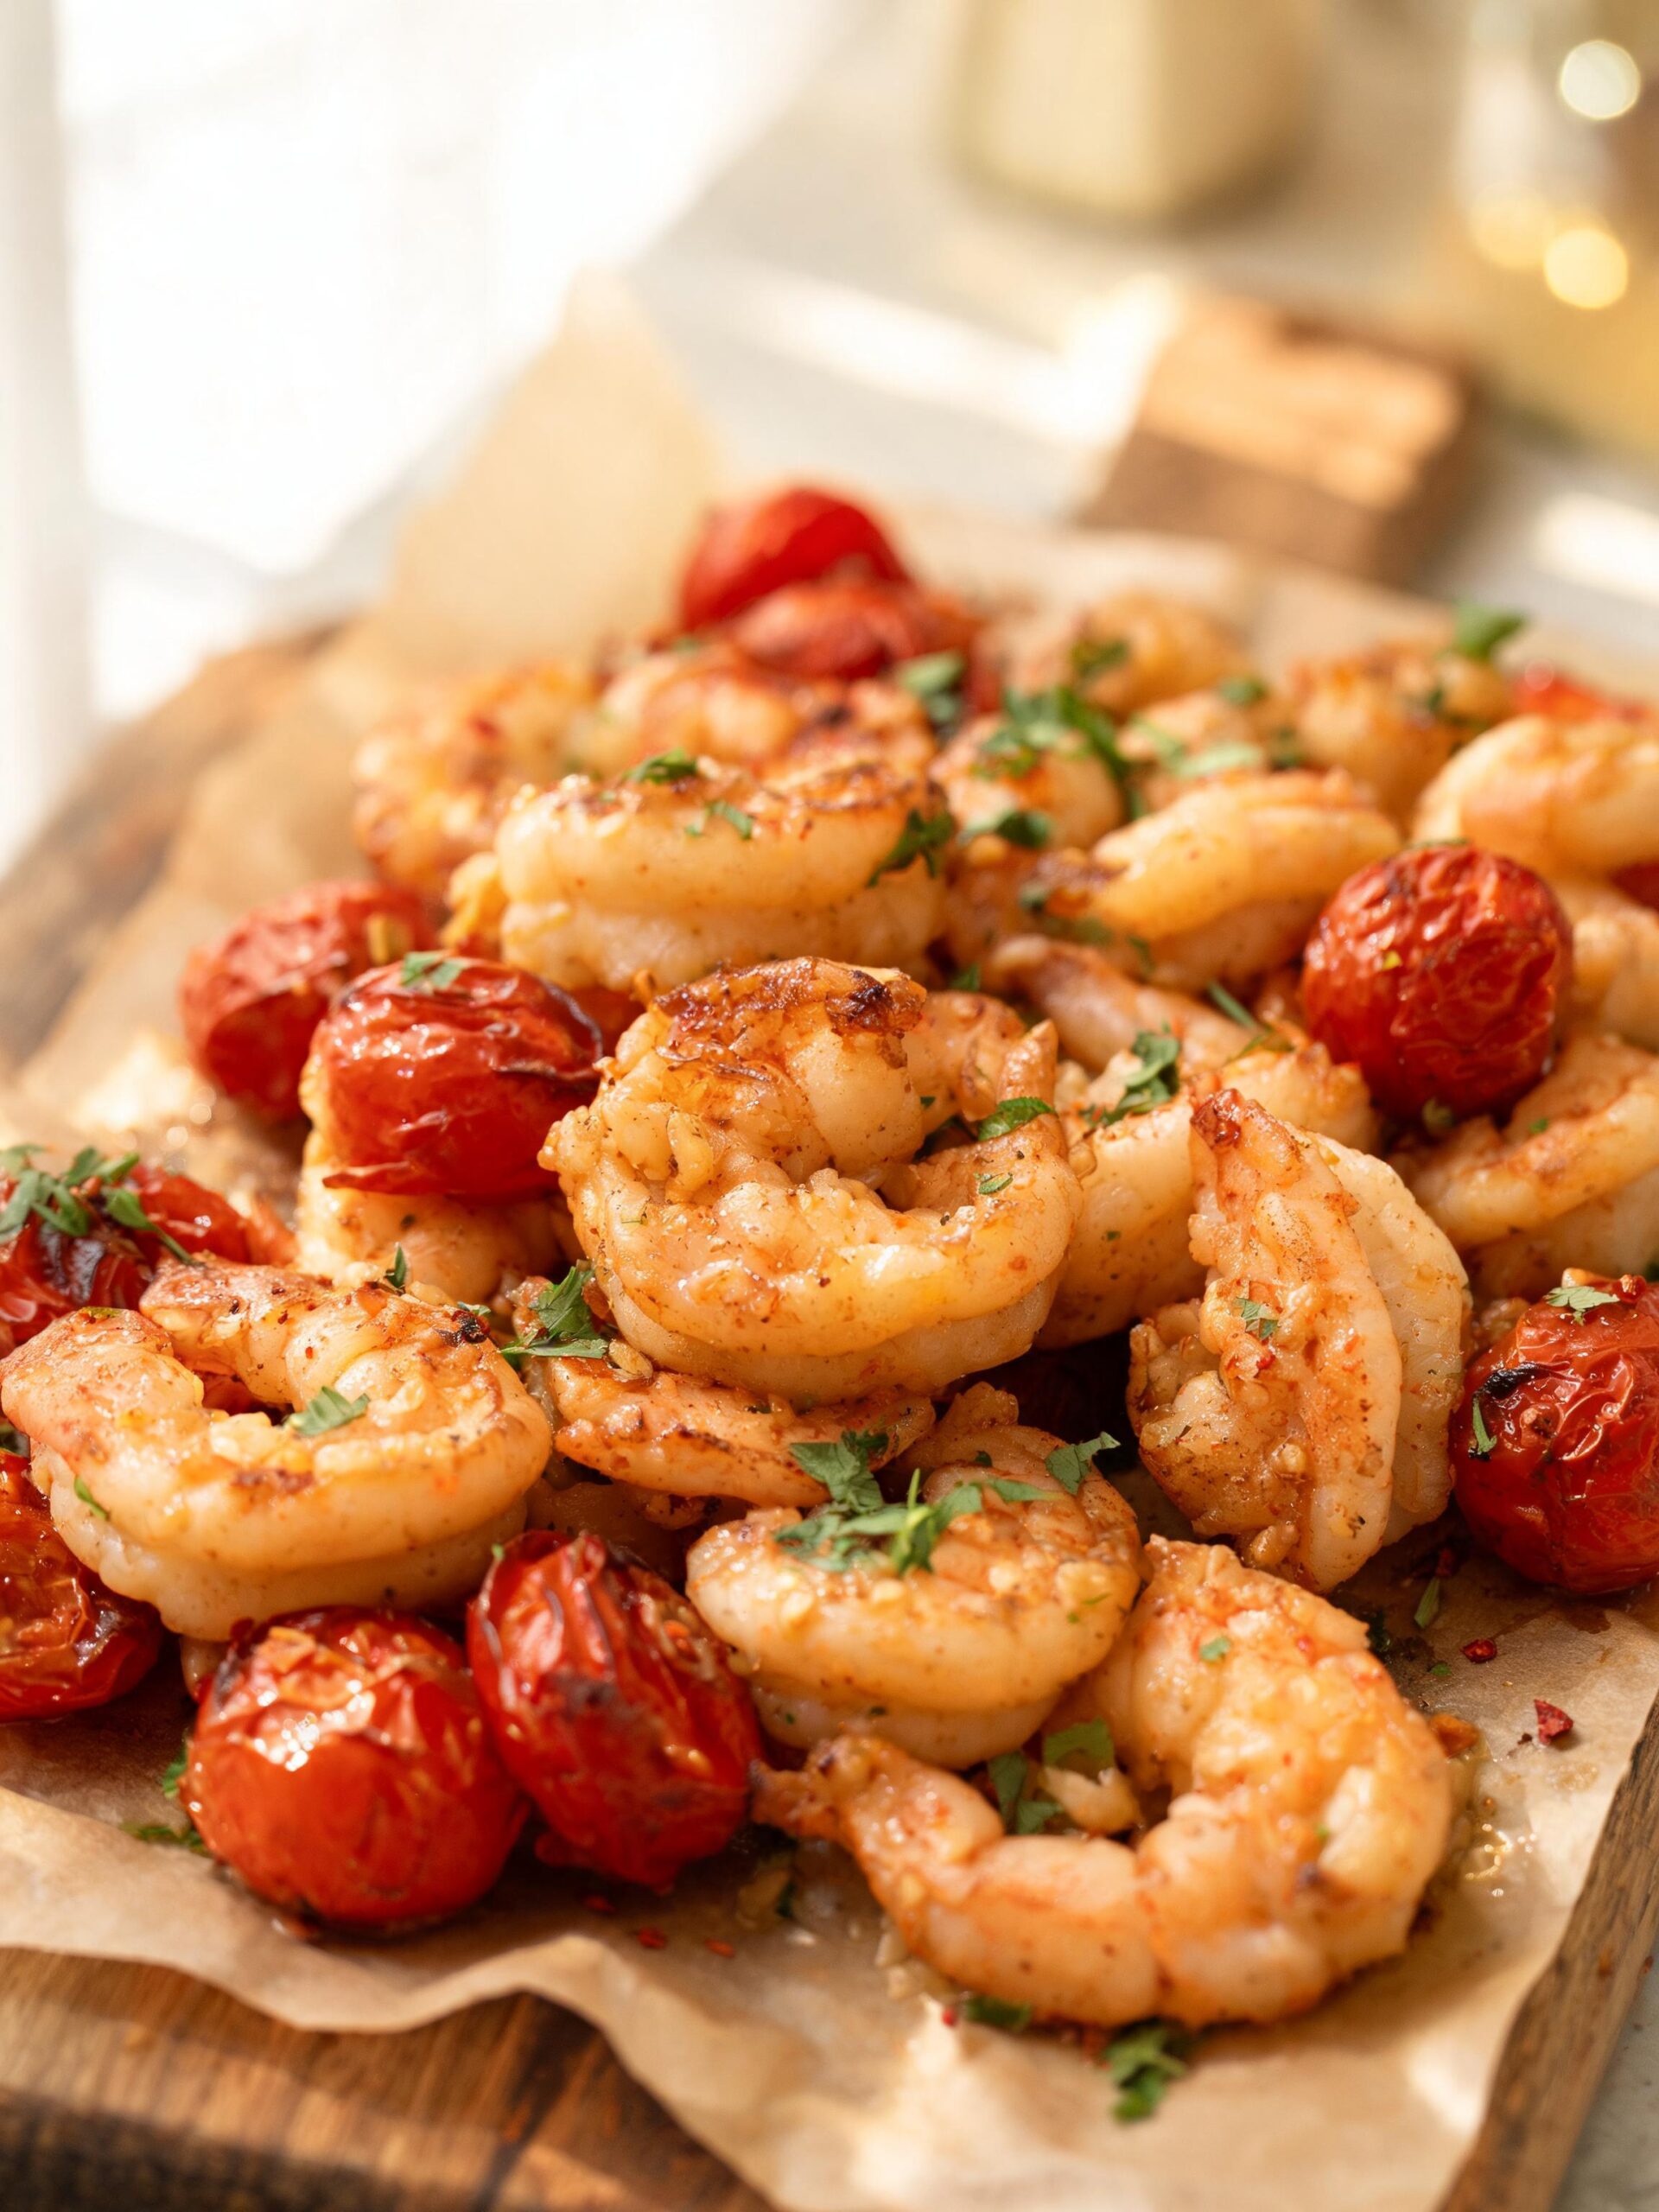
For twenty years, I’ve seen countless home cooks struggle with shrimp. It’s a delicate protein that goes from perfect to rubbery in sixty seconds. This recipe for Garlic Butter Shrimp is my answer to that problem. We’re ditching the high-stress, high-splatter stovetop method—often used for dishes like crispy fried calamari—for a foolproof baking technique that gives you total control. By roasting everything on a single sheet pan, we concentrate flavors, cook the shrimp evenly, and create a sauce that’s begging to be soaked up with crusty bread. The addition of cherry tomatoes, which burst and release their sweet, acidic juices into the garlic butter, creates a truly complete dish. This isn’t just another shrimp recipe; it’s a reliable method you’ll master on the first try and come back to again and again for a quick, impressive weeknight dinner or a casual dinner party main.
Why You’ll Love This Recipe
- Practically Hands-Off: After a quick toss, the oven does all the heavy lifting. This frees you up to prepare a side salad or pour a glass of wine instead of being chained to a hot skillet, constantly stirring and worrying about timing.
- Intense, Concentrated Flavor: Roasting the tomatoes and garlic brings out a deep, caramelized sweetness you just can’t get from a pan. The butter browns slightly, adding a nutty complexity to the sauce that coats every single shrimp.
- Foolproof and Consistent: Baking provides gentle, even heat that surrounds the shrimp, making it significantly harder to overcook them compared to the direct, often uneven heat of a stovetop burner. You get perfectly tender, succulent shrimp every single time.
Ingredients List
Precision is key in a simple recipe like this. Using high-quality ingredients will make a noticeable difference. The foundation of any great Garlic Butter Shrimp is fresh, properly sized shrimp and good butter. This recipe serves four people generously.
For the Shrimp and Tomatoes:
- Shrimp: 1.5 lbs large shrimp (16/20 count), peeled and deveined, tails on or off (your preference).
- Cherry Tomatoes: 2 pints (about 4 cups) cherry or grape tomatoes.
- Olive Oil: 2 tablespoons extra virgin olive oil.
- Kosher Salt: 1 teaspoon, plus more for finishing.
- Black Pepper: 1/2 teaspoon freshly cracked black pepper.
For the Garlic Butter Sauce:
- Unsalted Butter: 1/2 cup (1 stick), cut into cubes.
- Garlic: 6-8 cloves, minced (don’t be shy!).
- Lemon: 1 large lemon, for 2 tablespoons of juice and wedges for serving.
- Red Pepper Flakes: 1/4 to 1/2 teaspoon, depending on your heat preference.
- Fresh Parsley: 1/2 cup, finely chopped, plus more for garnish.
Step-by-Step Instructions
Follow these steps exactly for restaurant-quality results. The key is the two-stage cooking process: giving the tomatoes a head start before adding the delicate shrimp.
- Preheat and Prep the Pan: Adjust your oven rack to the middle position and preheat to 400°F (200°C). Don’t skip the preheating; a hot oven is crucial for roasting, not steaming.
- Roast the Tomatoes First: On a large, rimmed baking sheet, combine the cherry tomatoes, olive oil, 1/2 teaspoon of the kosher salt, and the black pepper. Toss well to coat everything evenly. Spread them into a single layer. Roast for 15 minutes. You’re looking for the tomatoes to soften and just begin to blister and burst.
- Prepare the Shrimp and Sauce: While the tomatoes are roasting, pat the shrimp completely dry with paper towels. This is a critical step for getting a good texture. In a medium bowl, combine the dry shrimp with the remaining 1/2 teaspoon of kosher salt. In a separate, small microwave-safe bowl or a small saucepan, melt the butter. Once melted, stir in the minced garlic and red pepper flakes.
- Combine and Bake: After the tomatoes have roasted for 15 minutes, carefully remove the hot pan from the oven. Push the tomatoes to one side of the pan. Add the seasoned shrimp to the empty side in a single layer. Pour the garlic butter mixture evenly over both the shrimp and the tomatoes.
- Finish Roasting: Return the pan to the oven and roast for another 5-8 minutes. The exact time will depend on the size of your shrimp. You’ll know they’re done when they are pink, opaque, and curled into a loose ‘C’ shape. Be careful not to overcook.
- Finish and Serve: Remove the pan from the oven. Immediately squeeze the fresh lemon juice all over the shrimp and tomatoes. Sprinkle generously with the chopped fresh parsley and toss everything together gently in the pan. The residual heat will create a beautiful, emulsified pan sauce. Serve immediately with lemon wedges on the side.
Chef’s Pro Tips for Success
After making thousands of shrimp dishes, I’ve learned a few non-negotiable rules. These tips will elevate your dish from good to unforgettable and help you get the absolute best Garlic Butter Shrimp possible.
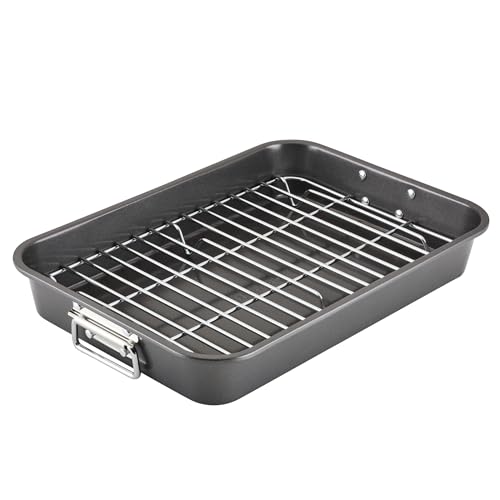
Speaking of getting the best results, one of the most critical tools for this exact dish is a reliable, heavy-duty roasting pan. I personally use the Farberware Nonstick Roaster because its large surface area is essential for preventing the overcrowding I mentioned, ensuring the shrimp and tomatoes roast perfectly instead of steaming. The sturdy, nonstick surface means nothing gets left behind, and the high sides contain all that glorious garlic butter sauce, which is key for serving. It’s a simple, affordable workhorse that delivers consistent, professional results every single time.
If you’re ready to master this foolproof method, having the right pan is half the battle. You can check out the exact one I recommend on Amazon.
Farberware Nonstick Bakeware 11-Inch x 15-Inch Roaster with Flat Rack
✓ prime
We earn a commission if you make a purchase, at no additional cost to you.
- The 15-Minute Dry Brine: For the plumpest, juiciest shrimp, perform a quick dry brine. After patting your shrimp bone-dry, toss them in a bowl with 1 teaspoon of kosher salt and 1/2 teaspoon of sugar (optional, but it balances the salt). Let them sit in the fridge for just 15-30 minutes while you prep other ingredients. The salt draws out excess water and then dissolves, creating a brine that gets reabsorbed, seasoning the shrimp from the inside out and improving their texture.
- Don’t Use a Garlic Press: A garlic press ruptures the cell walls of the garlic aggressively, which can lead to a harsh, almost acrid flavor, especially under high heat. For a sweeter, more aromatic garlic flavor, take the time to mince the cloves with a sharp knife. This cleaner cut preserves the integrity of the garlic, allowing it to mellow and infuse the butter beautifully without burning as quickly.
- The Importance of a HOT Pan: When you add the shrimp and butter to the pan that’s already been in a 400°F oven, the pan itself is scorching hot. This immediate contact with a hot surface helps the shrimp cook quickly and evenly, preventing that dreaded rubbery texture. It’s the sheet-pan equivalent of searing.
- Create a Stable Sauce with Lemon: Add the lemon juice *after* the pan comes out of the oven, not before. High heat can cause the acidic lemon juice and the fat from the butter to separate or ‘break.’ By adding it off-heat and tossing, you use the residual heat to gently emulsify the juice into the butter and tomato liquids, creating a cohesive, glossy sauce that clings to the shrimp.
- Buy the Right Shrimp: Always opt for raw, wild-caught shrimp if possible. Look for a size count of 16/20 or 21/25 per pound. This indicates a larger shrimp that can stand up to the roasting time needed for the tomatoes without overcooking. Avoid any shrimp that smells of ammonia or iodine—fresh seafood should smell clean, like the ocean.
Common Mistakes to Avoid
This is an easy recipe, but a few common missteps can compromise the final result. Here’s what to watch out for.
- Not Drying the Shrimp Properly: This is the number one mistake. If shrimp carry excess moisture into the pan, they will steam in the oven instead of roast. This creates a watery, diluted pan sauce and gives the shrimp a soft, boiled texture. Take an extra minute to pat each shrimp thoroughly dry with paper towels. You want them to look matte, not glistening with water.
- Overcrowding the Baking Sheet: If you pile the shrimp and tomatoes on top of each other, you trap steam. Use the largest rimmed baking sheet you own. Everything should be in a single, even layer with a little bit of space. If your pan is too small, it’s better to use two pans than to overcrowd one. Proper spacing ensures hot air can circulate, which is the key to roasting.
- Adding the Shrimp Too Early: Shrimp cook in minutes. The tomatoes need a solid 15 minutes to soften and release their juices. If you add everything at once, by the time the tomatoes are ready, your shrimp will be tough, shrunken, and disappointing. The two-step cooking process is the most important part of this recipe’s timing.
- Using Bottled Lemon Juice: The difference between fresh-squeezed lemon juice and the stuff from a plastic bottle is night and day. Bottled juice has a dull, often metallic or slightly bitter taste due to preservatives and pasteurization. Fresh lemon juice provides the bright, clean acidity that cuts through the richness of the butter and elevates the entire dish. It’s a small detail that makes a huge impact.
Variations and Serving Ideas
Once you’ve mastered the base recipe, you can easily adapt it. This method is a fantastic canvas for other flavors. Here are a few ideas to take your Garlic Butter Shrimp to the next level.
- Add White Wine and Shallots: For a scampi-style variation, add 1/4 cup of a dry white wine like Sauvignon Blanc or Pinot Grigio and 1 finely minced shallot to the melted butter. Let it simmer for a minute before pouring over the shrimp. The alcohol will cook off in the oven, leaving behind a wonderful depth of flavor.
- Incorporate Different Herbs: While parsley is classic, other herbs work beautifully. Try adding a tablespoon of fresh chopped oregano or a handful of fresh basil leaves (stirred in at the very end with the parsley) for a more Mediterranean feel. A sprinkle of fresh dill at the end is also fantastic.
- Make it Spicy: If you love heat, don’t just stop at red pepper flakes. Add 1/2 teaspoon of smoked paprika to the butter for a smoky heat, or add a finely minced jalapeño or serrano pepper to the tomatoes during their initial roast.
- Serve Over Different Bases: This dish is incredibly versatile. Serve it over angel hair pasta or linguine to soak up the sauce. For a lower-carb option, serve it over zucchini noodles or a bed of spaghetti squash. It’s also fantastic spooned over creamy polenta, risotto, or simple steamed white rice, which is also the foundation for other classic meals like our authentic Spanish seafood paella. And of course, you can never go wrong with a loaf of crusty sourdough bread for dipping.
What to Serve With
Because the main dish is so rich and flavorful, you’ll want sides that are simple and fresh to provide balance.
- Crusty Bread: This is non-negotiable. A good baguette or sourdough is the perfect vehicle for mopping up every last drop of the incredible pan sauce.
- Simple Green Salad: A salad of arugula or mixed greens tossed in a bright lemon vinaigrette provides a fresh, peppery counterpoint to the rich butter sauce.
- Roasted or Steamed Vegetables: Simple steamed asparagus with a squeeze of lemon or roasted broccoli or broccolini tossed with a little olive oil and salt are excellent choices that won’t compete with the main dish.
- Creamy Polenta or Rice: For a more substantial meal, serving the shrimp and sauce over a bed of soft, creamy polenta or fluffy jasmine rice is a perfect way to make it heartier.
Storage and Reheating
Seafood is always best eaten fresh, but if you have leftovers, proper storage and reheating are critical to preserving its texture.
- Storage: Allow the shrimp and tomatoes to cool to room temperature, then transfer to an airtight container. Make sure to scrape all the valuable sauce from the pan into the container as well. Store in the refrigerator for up to 2 days. Any longer and the texture of the shrimp will degrade significantly.
- Reheating: The microwave is the enemy of leftover shrimp; it will make them rubbery in seconds. The best way to reheat is gently in a skillet over low heat. Add the shrimp, tomatoes, and sauce to the pan, perhaps with a splash of water or chicken broth to loosen the sauce. Heat, stirring occasionally, just until warmed through. Do not let it boil. This gentle method preserves the shrimp’s tender texture.
FAQs (People Also Ask)
Here are answers to some of the most common questions about making Garlic Butter Shrimp at home.
- Can I use frozen shrimp for this recipe?
- Absolutely. Frozen shrimp is often a great, high-quality option. The key is to thaw it correctly. The best method is to place the frozen shrimp in a colander in the sink and run cold water over them for 5-10 minutes, tossing occasionally, until thawed. Never use hot water. Once thawed, you must pat them exceptionally dry with paper towels before proceeding with the recipe.
- What is the best way to peel and devein shrimp?
- If your shrimp aren’t already prepared, start by pulling off the legs, then crack the shell open along the underside. The shell should peel off easily, leaving the tail if you wish. To devein, make a shallow cut with a small paring knife along the back of the shrimp. You’ll see a dark line, which is the digestive tract. Use the tip of the knife or a toothpick to lift it out and discard it.
- Can I make this dish with other seafood?
- Yes, this method works well with other quick-cooking seafood. You could substitute the shrimp with bay scallops or chunks of a firm white fish like cod or halibut (cut into 1-inch pieces). The cooking time will be very similar, so just watch for the seafood to become opaque and cooked through.
- My garlic butter sauce seems thin. How can I thicken it?
- The pan sauce is naturally thin and meant for dipping. However, if you want it a bit thicker, you can create a ‘beurre manié’. After removing the shrimp and tomatoes from the pan, pour the remaining sauce into a small saucepan. Mash together 1 tablespoon of softened butter and 1 tablespoon of all-purpose flour to form a paste. Whisk this paste into the sauce over low heat until it thickens slightly. Don’t boil it.
- Is it necessary to use unsalted butter?
- I strongly recommend it. Different brands of salted butter contain varying amounts of salt, which makes it very difficult to control the final seasoning of your dish. By using unsalted butter, you control the salt level completely, seasoning the dish with kosher salt to your exact preference. This ensures a perfectly balanced result every time.
Nutrition
Nutrition Facts
(Per serving. Estimates only, varies by exact ingredients used)
Conclusion
This Quick Baked Garlic Butter Shrimp is more than just a recipe—it’s a technique that puts you in control, guaranteeing a delicious, perfectly cooked seafood dinner with minimal fuss. The combination of sweet, burst tomatoes and rich garlic butter creates a sauce so good, you won’t want to leave a single drop behind. I hope this becomes a new favorite in your kitchen. Give it a try, and you’ll see just how easy an impressive shrimp dinner can be.
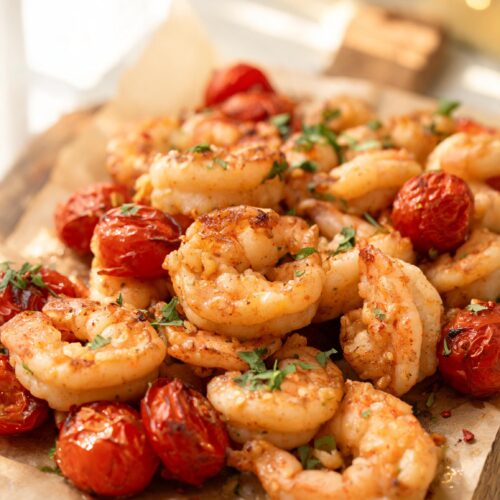
Quick Baked Garlic Butter Shrimp with Roasted Tomatoes
Ingredients
- 1.5 lbs large shrimp (16/20 count), peeled and deveined
- 2 pints cherry or grape tomatoes
- 2 tablespoons extra virgin olive oil
- 1 teaspoon kosher salt, divided
- 1/2 teaspoon freshly cracked black pepper
- 1/2 cup (1 stick) unsalted butter, cut into cubes
- 6-8 cloves garlic, minced
- 1 large lemon, juiced (about 2 tablespoons)
- 1/4 to 1/2 teaspoon red pepper flakes
- 1/2 cup fresh parsley, finely chopped
Instructions
- Adjust oven rack to the middle position and preheat to 400°F (200°C).
- On a large, rimmed baking sheet, combine cherry tomatoes, olive oil, 1/2 teaspoon kosher salt, and black pepper. Toss to coat and spread in a single layer. Roast for 15 minutes until softened and blistering.
- While tomatoes roast, pat the shrimp completely dry with paper towels. Season with the remaining 1/2 teaspoon kosher salt. In a separate small bowl, melt the butter, then stir in the minced garlic and red pepper flakes.
- Remove the hot pan from the oven. Push tomatoes to one side. Add the seasoned shrimp to the empty side in a single layer. Pour the garlic butter mixture evenly over both the shrimp and tomatoes.
- Return the pan to the oven and roast for an additional 5-8 minutes, or until shrimp are pink, opaque, and curled into a 'C' shape.
- Remove from the oven, immediately squeeze fresh lemon juice all over, and sprinkle with fresh parsley. Toss gently to combine in the pan sauce and serve immediately.