Introduction
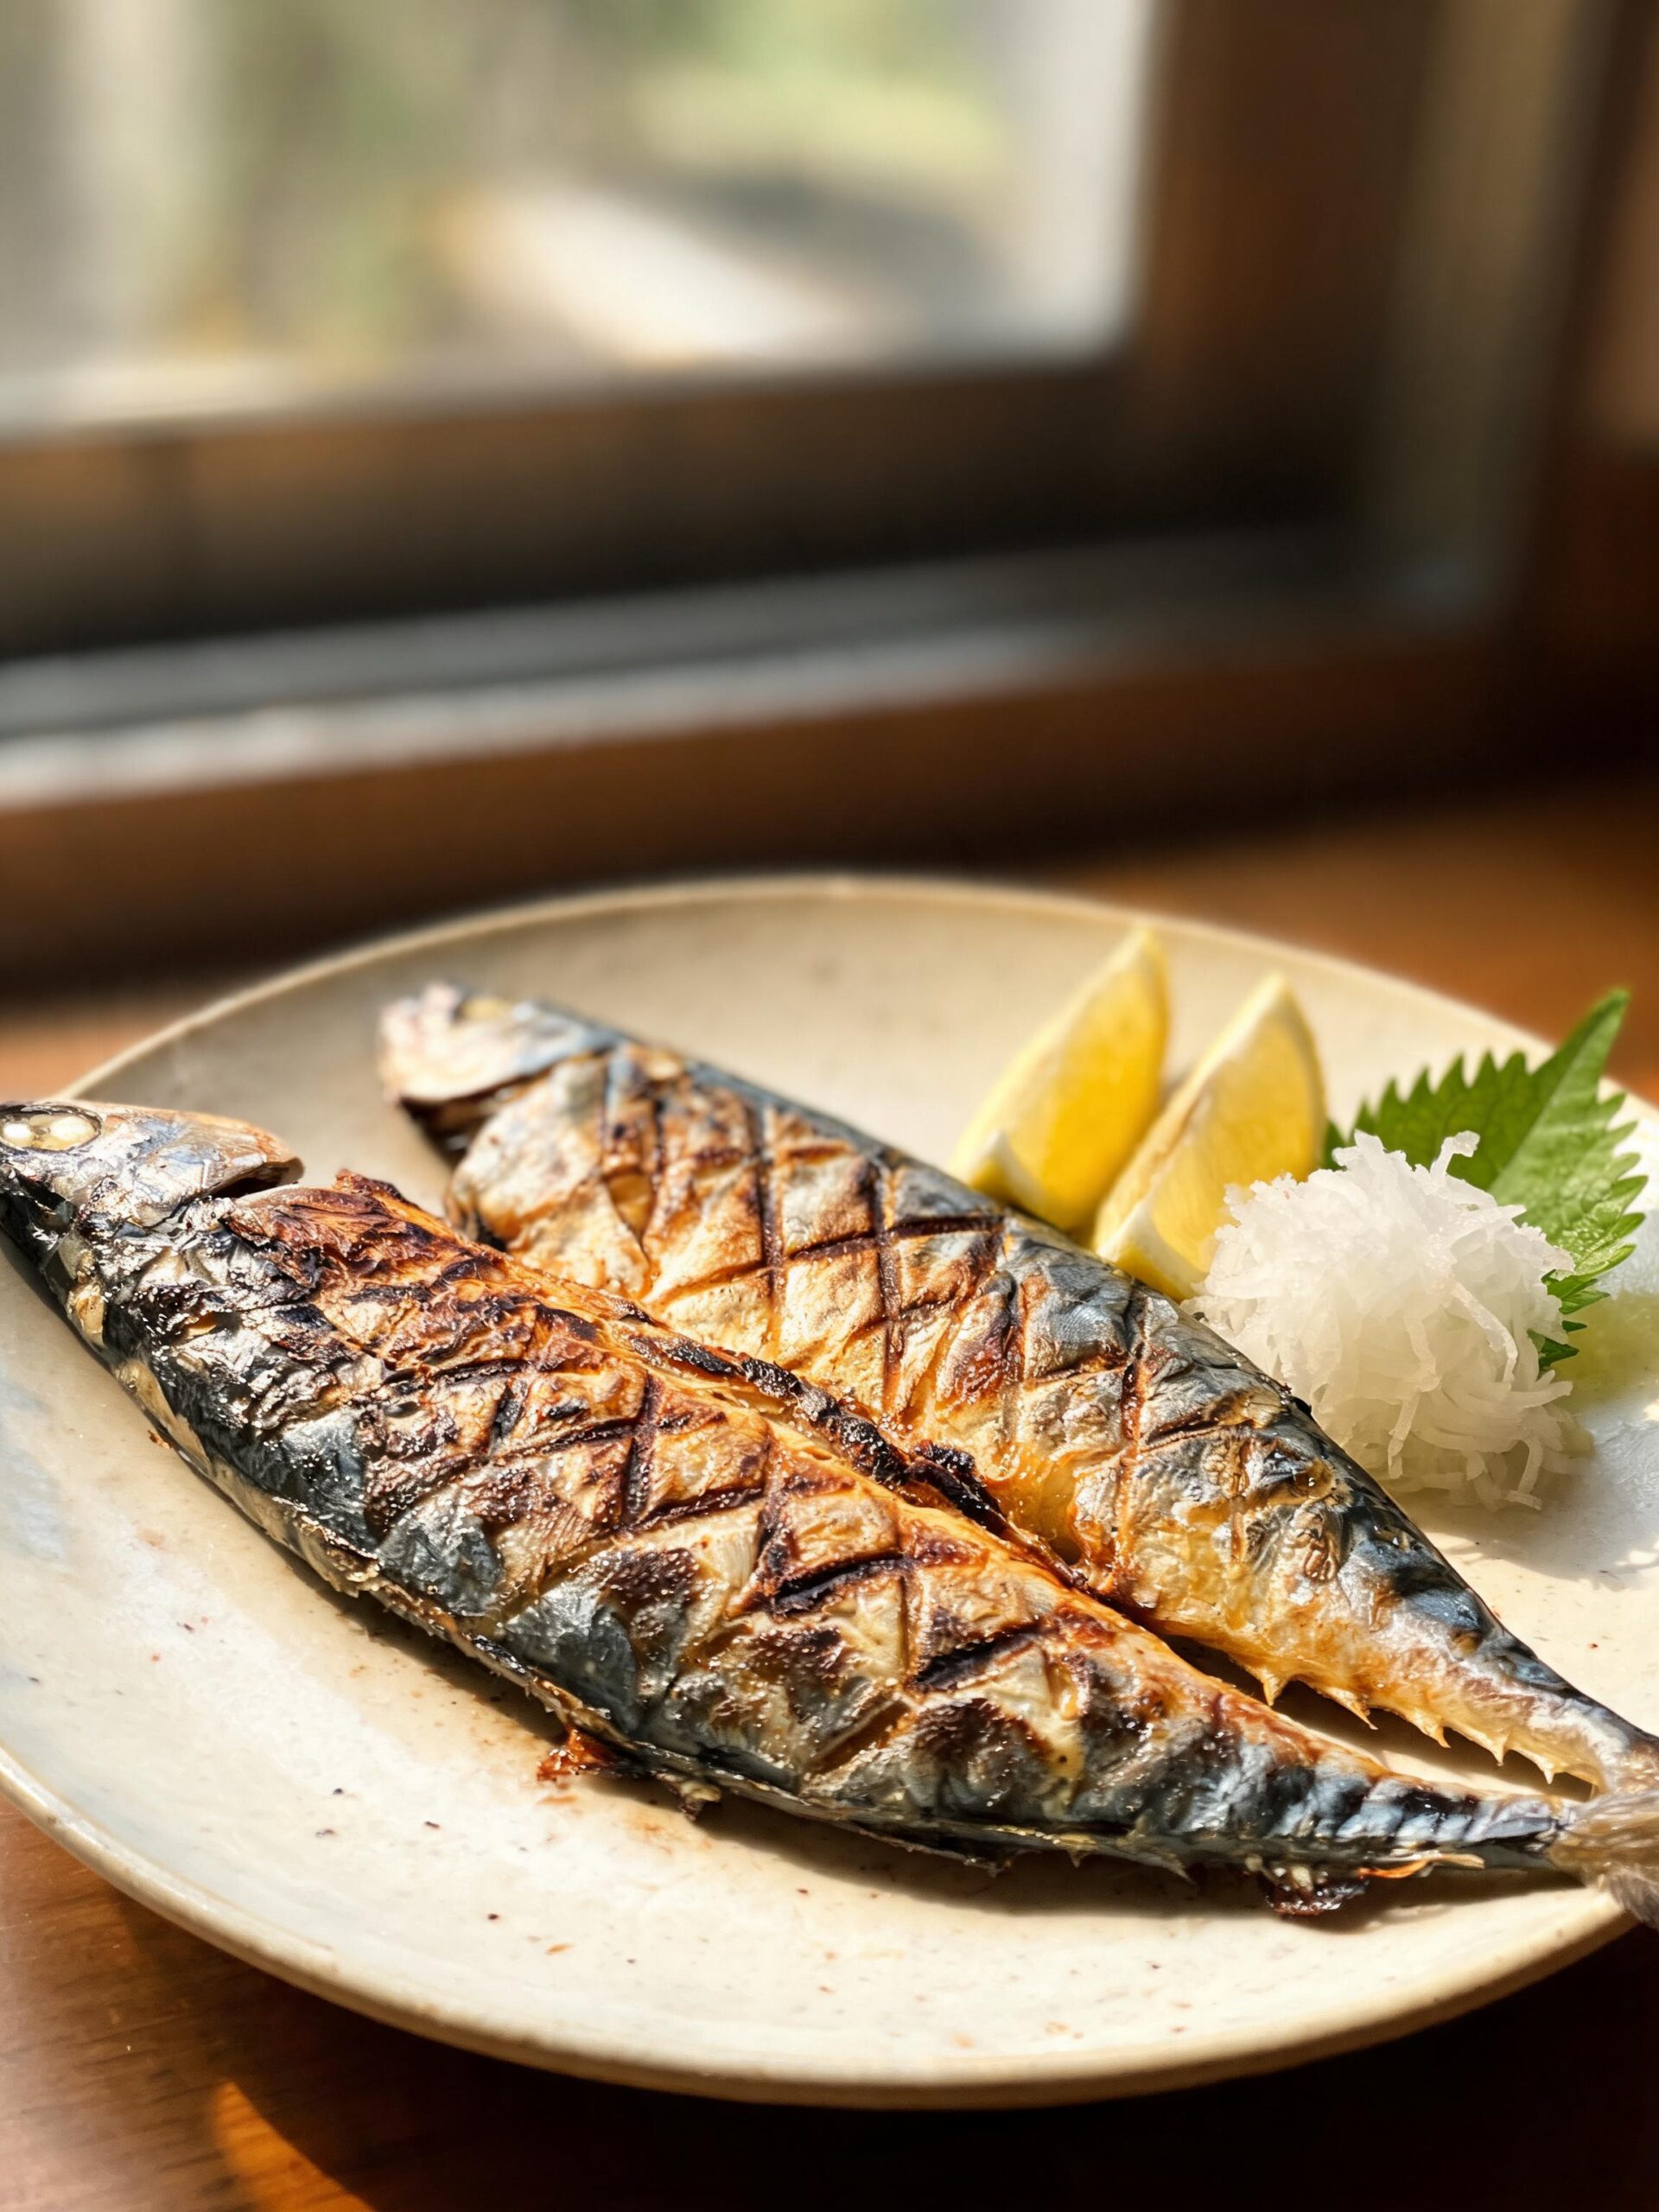
The first time I made Japanese Salt Grilled Fish at home, I honestly didn’t believe something so simple could taste that good. It was a classic Tuesday evening dinner, the kind where you’re tired and the fridge is mostly empty, and all I had was a couple of whole mackerel I’d picked up from the fish market that morning. No sauce. No marinade plan. Just fish and a box of sea salt sitting on the counter.
I’d eaten shioyaki — that’s what they call it in Japan — at a little spot near the harbor once, years ago. The skin was blistered and salty, the flesh just barely cooked through, and there was a wedge of lemon on the side that I kept squeezing more of because I couldn’t stop eating. I never forgot it.
So that Tuesday, I salted those mackerel heavy, let them sit, and ran them under the broiler. And honestly? It came out almost exactly like I remembered. Crispy, salty skin. Soft, clean fish underneath. The kind of dinner that makes you feel like you actually know what you’re doing in the kitchen, even when you don’t.
This easy Japanese Salt Grilled Fish is the recipe I keep coming back to. It’s fast, it’s real, and it doesn’t ask much of you.
Why You’ll Love This Recipe
- It’s genuinely fast — from salt to table in under 30 minutes, which matters on a weeknight when you’re running low on patience.
- The flavor is clean and deep at the same time. Salt draws out the natural richness of the fish without covering it up with sauces or spices.
- You don’t need any special equipment or skills. A broiler or a grill, some salt, and a fish. That’s really it.
Quick Recipe Snapshot
Recipe at a Glance
| Prep Time | 15 minutes |
| Cook Time | 15–20 minutes |
| Total Time | ~35 minutes |
| Servings | 4 |
| Difficulty | Easy — beginner friendly |
| Best For | Weeknight dinner, coastal lunch |
Ingredients List
For the Fish:
- 4 whole fish (mackerel, sea bass, snapper, or trout — about 10–12 oz each, cleaned and gutted) — whole fish grills better and stays juicier than fillets here
- 2 tablespoons coarse sea salt or kosher salt — this is the whole point, so don’t be shy with it
- 1 teaspoon fine sea salt — for a second, lighter layer after the rest period
For Serving:
- 2 lemons, cut into wedges — the acid cuts right through the rich fish fat and you’ll want more than you think
- 1 small daikon radish, finely grated (about ½ cup) — optional but traditional, and it genuinely helps balance the richness
- 2 tablespoons soy sauce — for dipping alongside the grated daikon if you want that classic touch
- Fresh shiso leaves or flat-leaf parsley — just a few, for something green on the plate
Optional Extras:
- 1 teaspoon sake or dry white wine — a small splash inside the cavity keeps things moist
- Neutral oil (vegetable or light sesame) — just a tiny brush on the grill grates to prevent sticking
Step-by-Step Instructions
- Score the fish. Using a sharp knife, make 2–3 diagonal cuts through the skin on each side of the fish, going about halfway into the flesh. This isn’t just for looks — it helps the salt penetrate and lets the heat get in evenly so the fish cooks through without the outside burning first.
- Salt it properly. Pat the fish dry with paper towels first. Then rub the coarse sea salt all over — the skin, inside the cavity, and into those scored cuts. Don’t be timid. You want a visible coating. Set the fish on a wire rack over a plate and let it sit uncovered in the fridge for at least 30 minutes, or up to 2 hours if you have time. The salt will draw out a little moisture and then the fish reabsorbs it. That’s what builds the flavor.
- Preheat your broiler or grill. You want high heat. If you’re using the broiler, set the rack about 6 inches from the element and let it heat up for a good 10 minutes. If you’re grilling outside, get the coals or burners hot before the fish goes on. Cold grates equal stuck fish.
- Lightly oil the grates or broiler pan. Just a wipe with a paper towel dipped in oil. Not a lot — you’re not frying anything. Just enough so the skin doesn’t tear when you flip it.
- Cook the fish. Place the fish on the grill or under the broiler. Cook for about 7–9 minutes on the first side without touching it. You’ll see the skin start to blister and char slightly at the edges — that’s exactly what you want. Flip carefully using a wide spatula and cook another 6–8 minutes on the second side. The fish is done when the flesh near the backbone pulls away cleanly and the skin is deeply golden and crisp in spots.
- Rest briefly and serve. Let the fish sit for just 2 minutes off the heat. Then plate it with lemon wedges, grated daikon on the side, and a little soy sauce for dipping if you like. That’s it. Dinner is done.
Side note — the first time I flipped a whole fish on the grill I tore the skin completely in half trying to rush it. Just leave it alone until it’s ready to release on its own. It’ll tell you.
Small Tricks From Cooking Fish at Home
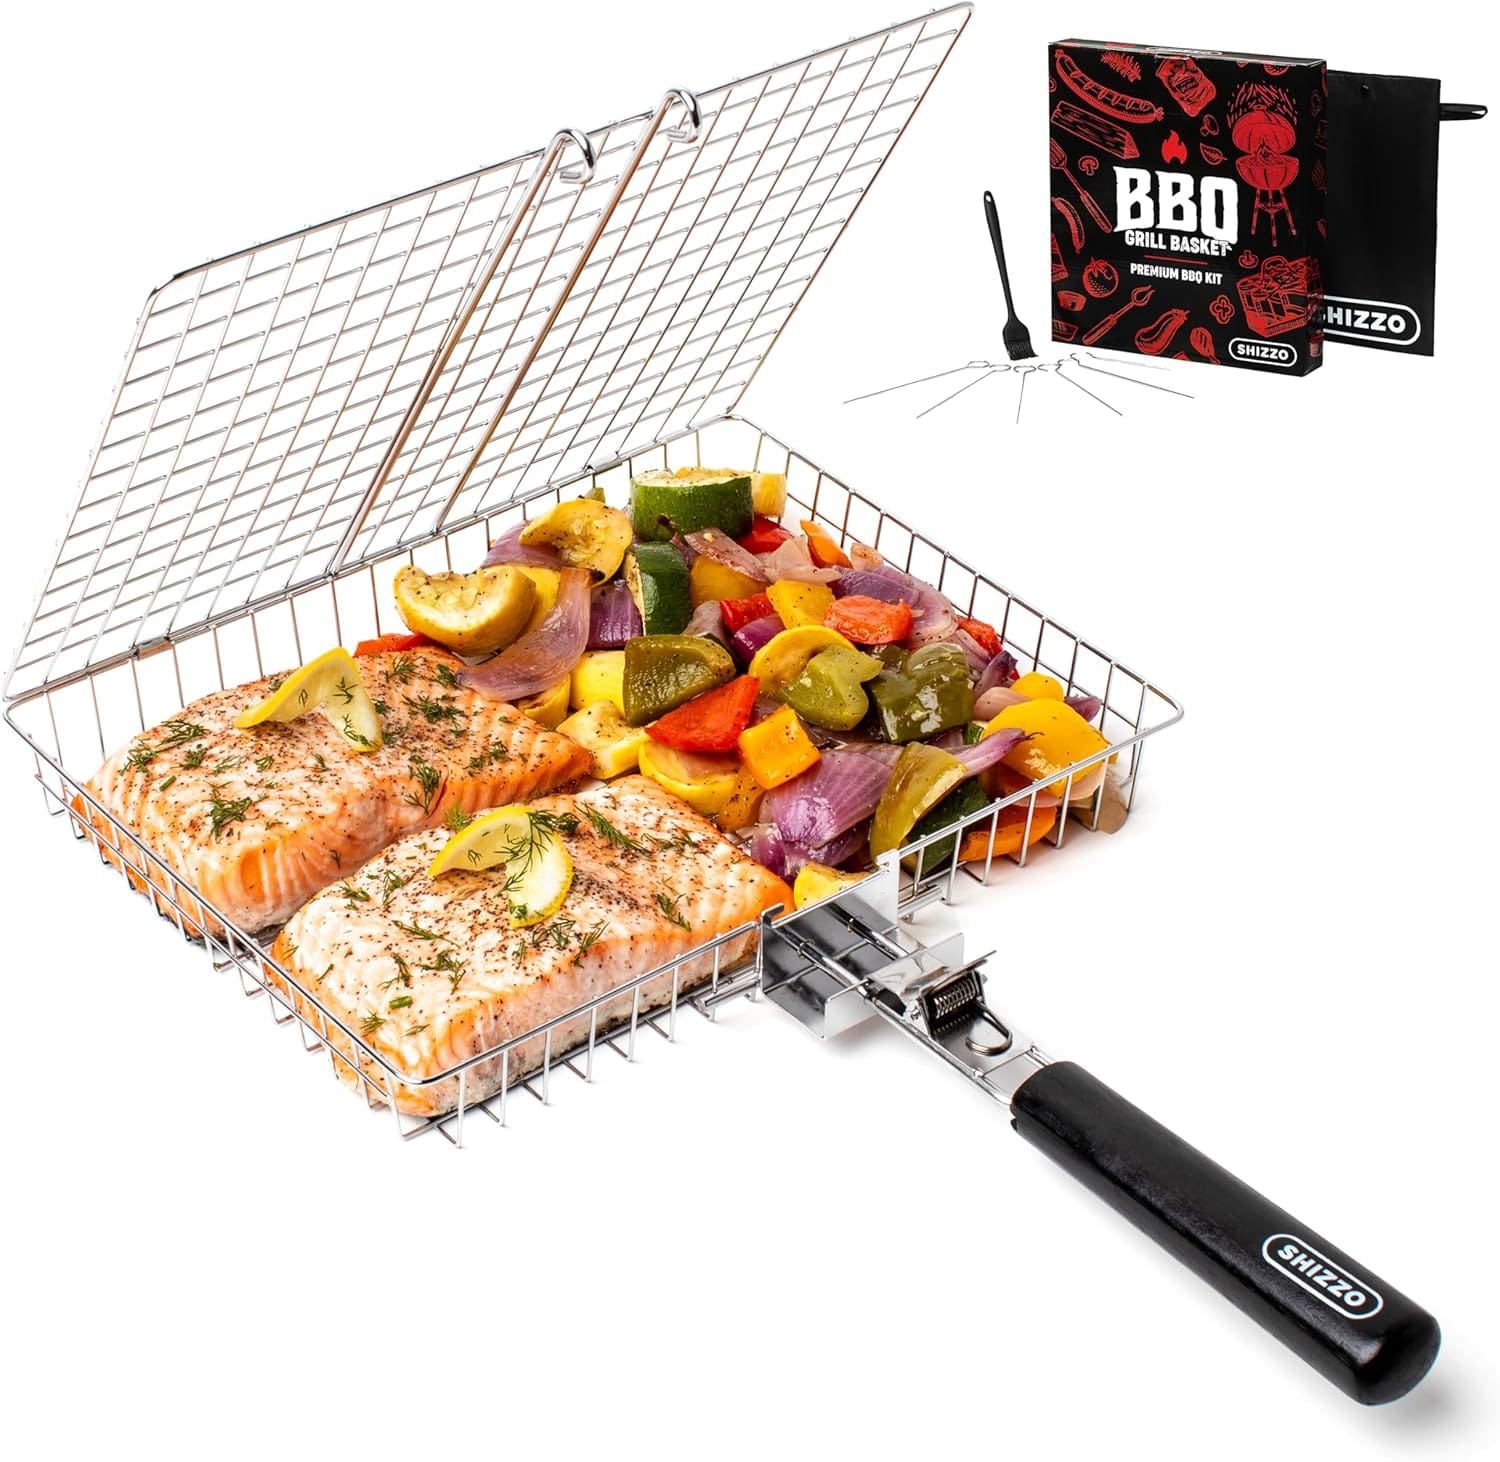
I’ll let you in on a little secret for absolutely foolproof grilled fish, especially when I’m working with a delicate whole fish. The biggest fear is always that perfect, crispy skin sticking to the grates or the fish breaking apart during the flip. That’s why I always use a fish grilling basket. It cradles the entire fish securely, letting all that high heat and smoky flavor through while allowing me to flip it with zero drama. It’s the difference between a potentially stressful cook and a guaranteed perfect result every single time.
Honestly, if you plan on grilling fish more than once, this simple tool is a game-changer. Get one for your kitchen and say goodbye to stuck-on fish forever.
Barbecue Grill Basket – Stainless Steel Folding Grilling Basket for Fish
✓ prime
We earn a commission if you make a purchase, at no additional cost to you.
Salt it longer than you think you need to. Thirty minutes is the minimum. An hour is better. Two hours changes the texture in a way that’s hard to explain — the flesh gets a little firmer, a little more defined, and the flavor goes deeper. I learned this by accident once when I got distracted and forgot the fish in the fridge for almost two hours. It was the best batch I’d made.
Dry the fish before the salt goes on. This sounds small but it matters. Wet skin steams instead of crisping. Paper towels, a good pat-down, then salt. That order makes a real difference.
Don’t skip scoring the skin. I used to skip it when I was lazy and the fish always cooked unevenly — the tail end would be overdone before the thickest part near the head was finished. The cuts let heat travel through the flesh more evenly.
The tail and fins will char. That’s fine. In Japan they actually wrap the tail in foil sometimes to keep it from burning, but honestly I kind of like the charred bits. They taste like the ocean and smoke. Don’t panic when you see it happening.
Grated daikon isn’t just decoration. It genuinely cleanses your palate between bites and cuts through the fat of oilier fish like mackerel or yellowtail. If you can find daikon at an Asian grocery, grab it. If not, a little finely grated white radish does something similar.
If you’re using fillets instead of whole fish, reduce the cook time significantly — skin-side down for about 4–5 minutes, then a quick 2 minutes on the flesh side is usually enough depending on thickness.
Common Mistakes to Avoid
Using too little salt. I know it sounds like a lot when you’re looking at the amount, but this is a salt-forward dish. The salt forms a kind of crust on the skin that crisps up under the heat. If you under-salt it, you end up with pale, soft skin and fish that tastes flat. Be generous.
Cooking on low or medium heat. This recipe needs high heat to work. Low heat just slowly steams the fish and you never get that blistered, caramelized skin. Crank it up and don’t second-guess it.
Flipping too early. This is the one that gets most people. The fish will stick to the grill if you try to flip it before it’s ready. When the skin releases cleanly on its own, it’s time. If you have to force it, wait another minute.
Skipping the resting time after salting. I’ve done this when I was in a hurry and the difference is noticeable. The salt needs time to do its thing — draw out moisture, season the flesh from the inside out. Rushing this step means the salt just sits on the surface and the inside of the fish tastes like nothing.
Variations and Serving Ideas
Spicy version: Mix a pinch of shichimi togarashi (Japanese seven-spice blend) into the salt before rubbing it on the fish. It adds a warm, layered heat that doesn’t overpower the fish flavor. You can find it at most Asian grocery stores or online.
Mild version: If you’re cooking for kids or people who are sensitive to strong fish flavors, use a milder fish like sea bream or tilapia and reduce the salt slightly. Serve with extra lemon and skip the daikon. It’s a gentler version of the same dish.
Coastal twist: After the fish comes off the grill, brush it lightly with a mix of melted butter, a squeeze of lemon, and a tiny bit of white miso. It’s not traditional but it’s really good — the miso adds a salty-sweet depth that works beautifully with the charred skin.
What to Serve With
Steamed short-grain white rice is the obvious choice and it’s obvious for a reason. The plain, slightly sticky rice is the perfect backdrop for salty, rich fish, much like it is for a simple crispy fried fish that actually stays crunchy. Don’t overthink it.
Miso soup on the side makes this feel like a complete meal without any extra effort. Even the instant kind works fine here.
If you want something fresh and crunchy to balance the richness, a simple cucumber salad with rice vinegar, a pinch of sugar, and sesame seeds is exactly right. Takes five minutes and cuts right through the fat of the fish.
Pickled vegetables — whatever you have — work well too. The acidity does the same job as the lemon, just in a different form.
Storage and Reheating
Leftover grilled fish keeps in the fridge for up to 2 days in an airtight container. After that it starts to smell more than it should and the texture goes soft in a way that’s hard to fix.
To reheat, the best method is a dry skillet over medium heat, skin-side down, for a few minutes. It brings some of the crispiness back and warms the fish through without drying it out completely.
DO NOT microwave it. I know it’s tempting when you’re tired. The microwave turns the skin rubbery and the flesh gets weirdly dry and the smell fills the whole kitchen. It’s not worth it.
DO NOT try to freeze already-cooked grilled fish. The texture when it thaws is genuinely unpleasant — mushy and waterlogged. If you want to freeze fish, freeze it raw before cooking.
FAQs (People Also Ask)
Can I use frozen fish for this recipe?
Yes, but thaw it completely in the fridge overnight first and pat it very dry before salting. Frozen fish holds more water and if you don’t dry it well, the skin won’t crisp properly. Fresh fish will always give you better results here, but a properly thawed and dried frozen fish works fine.
How do I know when the fish is done?
The most reliable way is to poke near the backbone with a fork or skewer. If the flesh pulls away cleanly and looks opaque all the way through, it’s done. Another sign is that the eyes turn completely white and the skin has visible charring in spots. If you’re unsure, always err on the side of a little more time — undercooked fish near the bone is not pleasant.
What fish works best for this?
Mackerel is the classic choice because the fat content makes it incredibly flavorful under salt and heat. Sea bass, snapper, trout, and yellowtail are all excellent too. Lean white fish like tilapia works but gives you a milder result. Avoid very thin fillets — they dry out too fast under high heat.
Can I substitute the daikon?
Absolutely. Finely grated white radish is the closest substitute. A small amount of plain Greek yogurt with a squeeze of lemon works as a creamy alternative. Or just skip it entirely and use extra lemon wedges — the dish doesn’t fall apart without it.
How long does this take start to finish?
If you count the salting rest time, about 45–50 minutes total. The actual hands-on time is maybe 15 minutes. It’s genuinely one of the faster seafood dinners you can put together at home, especially once you’ve done it once and know what you’re looking for.
Is this recipe beginner friendly?
Very much so. The technique is straightforward — salt, wait, apply heat. The hardest part is being patient enough not to flip the fish too early. If you can manage that, the rest takes care of itself.
Nutrition
Nutrition Facts
(Per serving. Estimates only, varies by exact ingredients used)
Conclusion
There’s something about this dish that keeps pulling me back. Maybe it’s how little it asks of you. Maybe it’s that the fish does most of the work on its own once you get out of the way. Or maybe it’s just that some flavors — salt, smoke, a little char, a squeeze of lemon — are so honest that they never get old.
I still think about that little harbor spot sometimes when I’m pulling fish off the grill. The way the skin crackled when you pressed it. The way the whole room smelled like the sea.
You can get pretty close to that at home. Closer than you’d think.
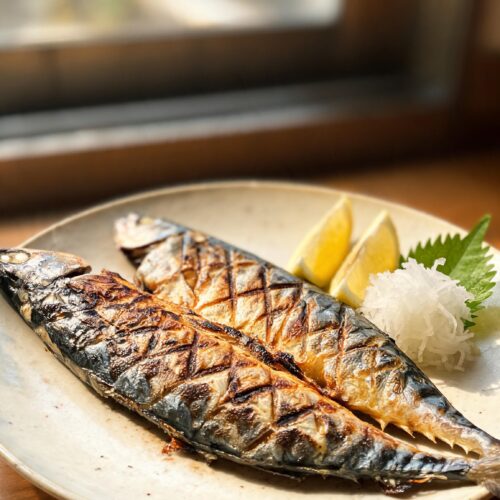
Japanese Salt Grilled Fish (Shioyaki Style)
Ingredients
- 4 whole fish such as mackerel, sea bass, snapper, or trout — about 10–12 oz each, cleaned and gutted
- 2 tablespoons coarse sea salt or kosher salt
- 1 teaspoon fine sea salt
- 2 lemons, cut into wedges
- ½ cup finely grated daikon radish (optional)
- 2 tablespoons soy sauce (for dipping, optional)
- Fresh shiso leaves or flat-leaf parsley for serving
- 1 teaspoon sake or dry white wine (optional, splash inside cavity)
- Neutral oil for brushing grill grates
Instructions
- Score the fish by making 2–3 diagonal cuts through the skin on each side, going about halfway into the flesh.
- Pat the fish completely dry with paper towels. Rub coarse sea salt generously all over the skin, inside the cavity, and into the scored cuts. Place on a wire rack over a plate and refrigerate uncovered for at least 30 minutes and up to 2 hours.
- Preheat your broiler or outdoor grill to high heat. Allow at least 10 minutes of preheating time.
- Lightly oil the grill grates or broiler pan with a paper towel dipped in neutral oil.
- Place the fish on the grill or under the broiler. Cook undisturbed for 7–9 minutes on the first side until the skin blisters and chars slightly at the edges.
- Flip carefully using a wide spatula and cook another 6–8 minutes on the second side until the flesh near the backbone pulls away cleanly and the skin is deeply golden and crisp.
- Remove from heat and rest for 2 minutes. Serve with lemon wedges, grated daikon, and soy sauce on the side.